NBA 2K24: How to Remove Player Injury

So, you’ve been putting in that work in NBA 2K24, but then BAM! One of your top players got hit with that injury bug. Sucks, right? But hey, don’t sweat it. I gotchu. We’re about to dive deep and get that superstar of yours back on the court, fresher than ever.
Dive into Your Roster
First things first, fam. You gotta know the sitch. Dive into your roster and peep that player with the injury. Click on their profile and see what’s up… Ankle? Knee? Groin? Hey, injuries happen to the best of ’em, but knowledge is power.
Editing Mode
Once you’ve got your player in sight, click on ’em. You’ll see an option pop up that says “Edit Player”. That’s your golden ticket. Dive into that.
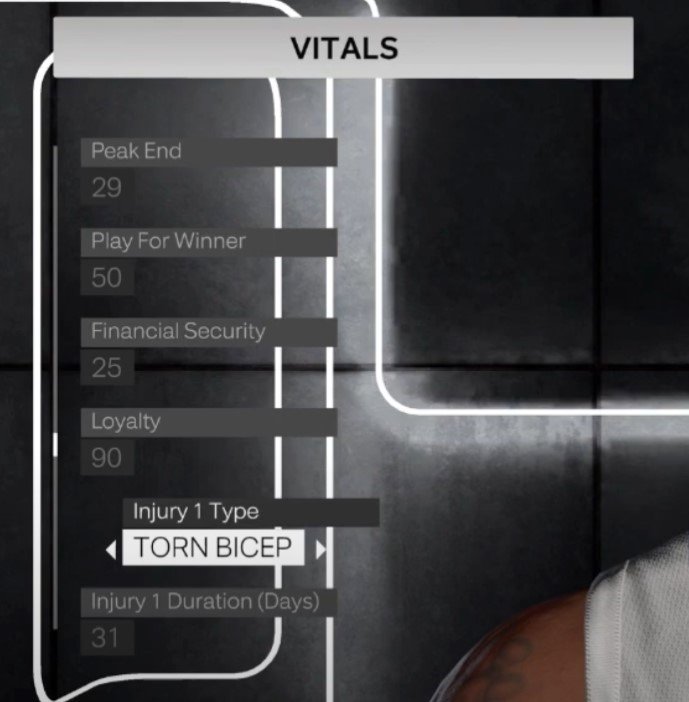
Scroll to ‘Injury Type 1’
So now that you’re in the edit mode, scroll on down till you hit something called “Injury Type 1”. Now, I don’t know why 2K’s always gotta be complicated but just roll with it…
Time to Clear It Out
You’ll wanna change settings in ‘Injury Type 1’ until your screen pops up with this sweet little message asking if you wanna “Clear All Injuries”. Well, duh! Hit “Yes” with the energy of a LeBron fast break dunk.
Lock in those Changes
You’ve almost crossed the finish line. Once you’ve cleared that injury, you gotta make sure to lock it down. So, make sure to select the “Keep Changes and Return” option. This is like saving that game-winning shot – don’t miss it!
Player’s all healed up and ready to make some moves. Remember, injuries can hit any time, so always keep this guide in your back pocket. Don’t let an injury throw off your game – handle it like a pro, and get back to securing those W’s…


