HighFleet – Combat Guide
Combat
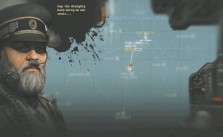
When you eventually encounter an enemy, you will need to take direct control and battle it yourself. You’ll engage up to 3 enemy ships at once, with 1 of your craft at a time. Your next ship will appear when the previous one is either destroyed or retreats. If the enemy’s squadron has more than 3 ships, more will appear as you destroy them.
Ground forces may also be present in addition to the aircraft. You only need to destroy all enemy aircraft (not the ground vehicles) to win the battle.
Sometimes a battle will feature a Prize Ship such as a Transport – if so, try not to destroy the indicated prize (it will have a gift box icon above it). If you destroy all of its escorts, you can capture the prize – drop a captive transport off at the next town for a cash ransom.
BATTLE PLANNING
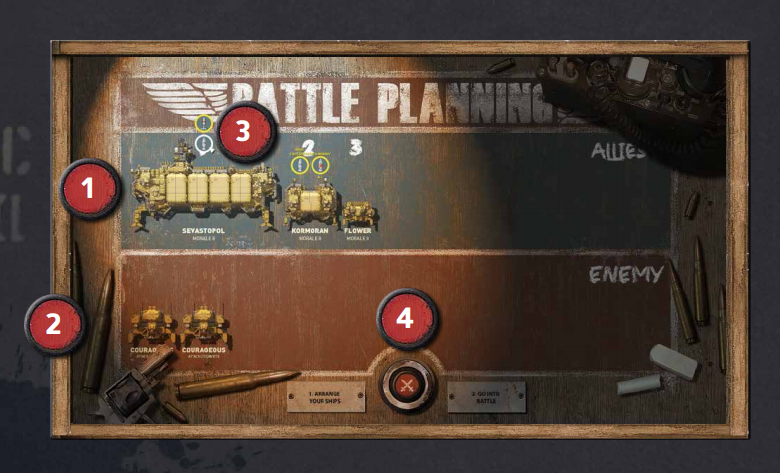
Before you dive into the action, you have a chance to reorder your attack craft and alter the ammunition loadout for ships that support it (depending on your inventory). Some strategic thinking here can pay dividends during the battle itself. If a “Tips” screen is first displayed, hit the lever to enter the Battle Planning screen.
1. Available Ships – Drag your ships around to change the order they will appear in battle.
2. Enemy Ships – You will face up to 3 of these at once. Ground forces are also shown.
3. Special Ammo Selection – If you have Special Ammo available, click the circle to change your ammo type. The amount of ammo on hand is displayed when chosen. Your normal HE rounds are unlimited.
4. Enter Battle – Click to begin your duel. Your strategy should adapt to your status and the enemy’s lineup – for example, if they have many ground defenses, you may want to rotate in your bombers to soften them up first. If a ship’s crew Morale is too low, they may RIOT and refuse to partake in the battle.
FIELD OF BATTLE
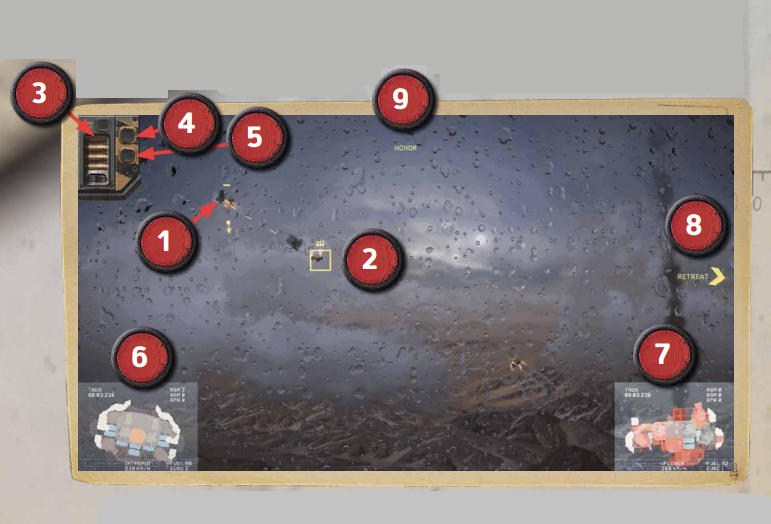
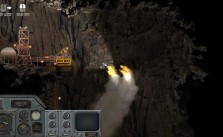
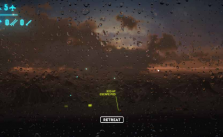
This is what it all comes down to. Kill or be killed on the field of battle. You control a single craft at a time against the enemy horde (3 at a time). Skill in maneuvering, management of weapons, a steady aim, and quick reactions are all required to triumph.
1. Your Ship – Why that’s you, my Tarkhan! The yellow arrow indicates where you are currently aiming your weapons. The arrow tip changes color according to your ammo type.
2. Enemy Ship – The enemy you’re currently targeting will have a yellow box around it. The symbol above indicates the loaded state of their ammo (with size indicating the ammo type). A Gift Box icon means the ship is a Prize and should not be destroyed (you will capture it if all its escorts are killed).
3. Ammo Cassette – Current ammo loaded for volley fire. The green light at the top will light up when fully loaded. This area will change to display remaining Flares and Fire Retardants as they are used.
4. Missile Lock – Lights up when an enemy missile is locked onto you. Pop flares!
5. Fire Alarm – Lights up when your ship is on fire. Put it out!
6. Ship Data – Your ship’s damage status, orientation, fuel level, and armament info.
7. Enemy Data – The same data for the currently targeted enemy.
8. Retreat – Fly here to escape the battle.
9. Honor – This bar increases when you kill enemies – hit a new rank, and you will be awarded a promotion after the battle.
A reminder of your combat controls and how to best utilize them:
× W/A/S/D keys – Thrust up/left/down/right to move. Be careful of inertia, and don’t get too close to the ground.
× Hold Shift key – Engage afterburners for a burst of extra speed while held. Holding too long will cause an Overheat and shut your engines off for a period.
× Mouse – Aim your weapons.
× Left Mouse button – Fire primary weapon.
× Right Mouse button – Fire auxiliary weapon (if available). Typically this would be a faster but weaker weapon good for taking out small, quick enemy scouts and incoming missiles.
× Middle Mouse button – Hold to set a bomb arc, release to drop the bomb (if available).
× R key – Cycle Ammo Type between regular HE ammo and the Special Ammo you chose before the battle began (if any). Be warned that reloading will take some time!
× [Only during your Aircraft Carrier attacks] R key – Command your airplanes to retreat.
× Space key – Fire guided anti-ship missile (if available) at the targeted enemy, with fire & forget thermal homing head.
× C key – Fire air defense missile (if available), which will protect against incoming tactical missiles and small airplanes launched from an aircraft carrier.
× F key – Pop decoy flares (if available) if an enemy missile is tracking you. The missile will veer towards the flares, but make sure you time it right (not too soon and not too late) and get out of the way yourself!
× B key – Expend a Fire Suppression unit (if available) to put out a fire on your craft or cool your overheated engines.
× X key – Launch airplane (if controlling aircraft carrier).
× T key – Abandon ship to save your crew (if rescue modules are intact).
COMBAT TIPS & TRICKS
A few combat tips, Tarkhan:
- The moment before an enemy shoots, its aim will be shown with red beams.
- Speed is the best defense. A small ship with skillful maneuvering can avoid most damage.
- Shoot with full “volleys.” At the same time, the cassette is being reloaded, pay more attention to dodging and lining up your next attack.
- Enemy missiles are not too difficult to dodge – try moving towards it then junking.
- Do not expose an unarmored underbelly or weak spot to enemy fire. Conversely, heavy armor is practically invulnerable to small-caliber rounds.
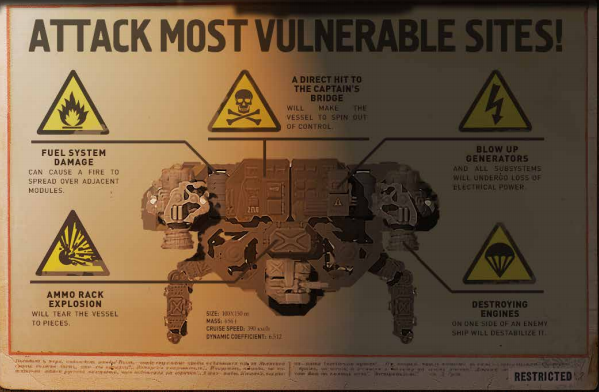
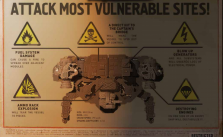
- The enemy display shows ammo rack blocks in orange. Blasting these will destroy small ships and inflict heavy damage on large ones. Try using armor-piercing ammunition.
- Only use capital ships such as the Sevastopol when necessary. These crafts are far more expensive to repair, and it takes an incredibly long time.
Hold down your fire buttons for rapid volley fire. However, this quickly empties your weapon’s loaded ammo. You will need to wait for the weapon to reload before you can fire again. The green light at the top of the ammo cassette will be lit when it is fully charged.
Weapons can be damaged during a battle, preventing you from reloading ammo or firing. You can also run out of Flares and Fire Retardants, so remember to stock up.
Try to attack vulnerable spots on the enemy. Some may have light armor on top, so attack them from above; others may have vulnerable points below. Each ship has different vulnerabilities to learn.
Try to attack vulnerable spots on the enemy. Some may have light armor on top, so attack them from above; others may have vulnerable points below. Each ship has different vulnerabilities to learn.
Note that Flare dispensers and Fire Suppression units are auto replenished after combat. However, be aware that the systems themselves can be destroyed during a fight (and need to be repaired afterward).
Even the best ship does not last long in battle without Fire Suppression. Missiles, on the other, need to be replaced at Shipworks.

